Why Java for Selenium? How to Implement Java for Testing

Selenium is the most prominent tool in the field of automation testing, whereas Java, on the other hand, is the most heavily used programming language in today’s market. Both of these technologies together make a perfect combination for automation Testing. Through the medium of this article, I will give you a complete insight into why you should use Java for Selenium.

Below are the topics I will be covering in this article:

  • Introduction to Selenium
  • Advantages of Selenium
  • Why use Java for Selenium
  • What to learn in Java for Selenium?
  • Demo to implement Java for Selenium

Introduction to Selenium

Selenium is the most popular open-source tool that is used widely for automating the tests which are carried out on web browsers. In other words, you can test web applications only with Selenium. You can neither test any desktop (software) application nor any mobile application using Selenium. To overcome this, much other software testing and mobile applications testing tools have been introduced in the market such as IBM’s RFT, HP’s QPT, Appium and many more. But still, Selenium dominates the world of Automation Testing. But the question that arises is, Why?

For starters, as I have already mentioned, Selenium is open-source, thus there is no licensing cost involved. This doesn’t seem much but actually it is a major advantage over other testing tools. Let’s now find out about the rest of the advantage in the next section of this Java for Selenium article.

Advantages of using Selenium

Few advantages are:

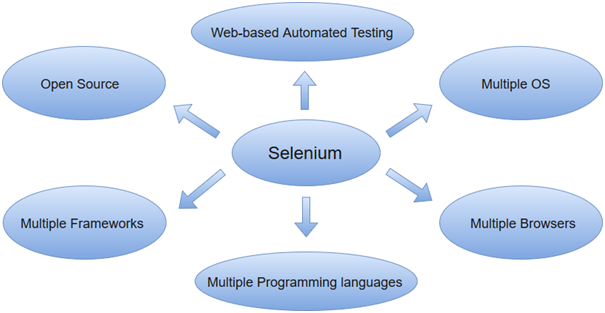
  • Tests can be carried in any OS such as Windows, Mac or Linux
  • Tests can be carried out using a wide range of browsers such as Internet Explorer, Google Chrome, Mozilla Firefox, Safari or Opera
  • It can be integrated with various tools such as TestNG & JUnit for test cases management and report generation
  • For continuous testing, it can be integrated with Maven, Jenkins & Docker to achieve Continuous Testing
  • Wide range of programming languages are used to write the test cases such as Java, Python, C#, PHP, Ruby, Perl & .Net. But among all these languages Java is most popularly used. 

But why Java? In the next section of this Java for Selenium article, I will give you the reasons for Java being the most popular language for automation.

Introduction to Selenium

Selenium WebDriver one of the most key component of SELENIUM Releases and on which current Automation industry totally rely on, specifically if we say “Open Source Community”.

What is WebDriver in simple and easy language if we say then “It is an API that’s easy to explore and understand, which help us to make our tests easier to read and maintain.” WebDriver is not linked to any kind of Test Framework or Tool and this makes this API more useful as we can use the same as per our needs or knowledge of other integration open sources like JUNIT, TestNG, etc.

  • A well designed Object-Oriented API that provides improved support for web-app testing problems.
  • Supports dynamic web pages where an element of a Page may change without the Page itself being reloaded.
  • All the limitations of SELENIUM RC rectified in this Selenium WebDriver

Selenium RC Limitations

  1. Work using Javascript injection leads to same-origin policy issues. WebDriver overcomes this limitation by having a driver for each browser.
  2. RC means Remote Control, while executing tests using Selenium RC it is obvious to have Selenium RC Server between Application under test & Test Automation Suite. This methodology of Client-Server architecture of Selenium RC makes it slower then Selenium Web Driver.
  3. Redundancy of commands
  4. RC cannot support a headless browser but WebDriver can.

WebDriver Architecture

  • WebDriver implemented on Layered Design, the idea behind this implementation is more and more usage of WebDriver for automation and this could be possible by fitting best fit languages.
  • Implementation of WebDriver is that each browser has a language that is most natural to use when attempting to drive it. Drivers are built as per the best-fit language and we can just see the wrapper around them.
  • We can say that for any of the browser drivers if any of the features work there in one binding language then it should be easy to add support to other binding languages also.
  • Web Driver is a compact Object Oriented API that can directly interacts with the Application under tests.
  • WebDriver utilizes the browser native compatibility to automation without using any peripheral entity.

Features of WebDriver

1) “Interface WebDriver”, which represents an idealized web browser used for testing. Three categories of methods in this class.

  • Control to browser
  • WebElements selection
  • Debugging

2) We discussed above about language bindings with browsers and it is just a thin wrapper which is exposed for us to write code as per our needs. This leads WebDriver to support “Multiple Languages” as well as “Multiple Support Browsers” which means that if any API supports multiple languages then this automatically leads to “Multiple Platforms”.

Speed difference between RC and WebDriver

WebDriver one to one communication with “Application under Test” makes it faster than Remote Control as RC creates one more interface between communications which is RC Server makes it likes Client-Server Communication. Snapshot below:-

WebDriver_5

WebDriver Existence in package org.openqa.selenium

org.openqa.selenium: The global package of Selenium which we import in our program every time when it is needed to use WebDriver. For reference, please see “org.openqa.selenium” mind map below :-

WebDriver_6

WebDriver: This is an interface that comes under this package of Selenium and a subinterface of “SearchContext”. “SearchContext” consists of “WebDriver” & “WebElement” as a sub interface.

WebDriver Interface

Let’s see what all WebDriver contains, for example: – What is “FirefoxDriver”: is a WebDriver which is used to interact with WebApps. So, this means that all the drivers should have all the implementations which are contracted in the WebDriver interfaces and all the Drivers can be called as WebDriver. See Figure below: –

Selenium Testing - WebDriver Interface
  • At a high level, if we can say that Driver means as per the selection of the Explorer driver will be selected and Driver will be used to interact with Web Page.
  • Web Page composed of Web Elements and these Drivers will communicate with the Web Page.
  • For communicating with Web Page means communication with Elements present on the Web Page like for example: “Textboxes”, Buttons”, “Links” etc. “WebElement” a sub interface of “SearchContext” comes into the picture. Let’s see this Interface also (Methods name and description in the table below).
Selenium Testing

Above table is providing us all the methods which we can use to interact with WebElements on Web Page but now for performing any of the operations on Web Element, we need to find the element first on Web Page as per the above table and method findElement(). For finding an element on Web Page, We need the address/locator of the element and we can achieve this.

In detail below that what all WebDriver comprises of.

WebDriver_10

Highlights

  • WebDriver: One of the most core component from Selenium
  • WebDriver: With vast features where driver covers all the features and properties of explorers
  • WebDriver: Gives us the opportunity to write once and execute on multiple platforms
  • WebDriver: Provides speed to Selenium architecture where communication with Application under Test becomes faster
  • WebDriver: Despite of working on any language or environment you need not to learn anything new it is just grab the knowledge and start producing results
  • WebDriver: Gives opportunity to explore something from core and can contribute from scratch till end in Automation process
  • WebDriver: Introduce AndroidDriver and IphoneDriver to explore Mobile world

External Reference: – “SELENIUMHQ.ORG”, for giving us the opportunity to explore Selenium.

Selenium tutorial

Selenium tutorial provides basic and advanced concepts of Selenium. Our Selenium tutorial is designed for beginners and professionals.

Selenium is one of the most widely used open source Web UI (User Interface) automation testing suite.

Our Selenium tutorial includes all topics of Selenium such as Features, Selenium vs QTP, Selenium Tool Suits, Selenium IDE, Selenium IDE Locating Strategies, Selenium WebDriver, WebDriver Features, WebDriver vs RC, WebDriver Installation, etc.

What is Selenium

Selenium is one of the most widely used open source Web UI (User Interface) automation testing suite.It was originally developed by Jason Huggins in 2004 as an internal tool at Thought Works. Selenium supports automation across different browsers, platforms and programming languages.

Selenium can be easily deployed on platforms such as Windows, Linux, Solaris and Macintosh. Moreover, it supports OS (Operating System) for mobile applications like iOS, windows mobile and android.

Selenium supports a variety of programming languages through the use of drivers specific to each language.Languages supported by Selenium include C#, Java, Perl, PHP, Python and Ruby.Currently, Selenium Web driver is most popular with Java and C#. Selenium test scripts can be coded in any of the supported programming languages and can be run directly in most modern web browsers. Browsers supported by Selenium include Internet Explorer, Mozilla Firefox, Google Chrome and Safari.

Selenium Tutorial What is Selenium

Selenium can be used to automate functional tests and can be integrated with automation test tools such as Maven, Jenkins, & Docker to achieve continuous testing. It can also be integrated with tools such as TestNG, & JUnit for managing test cases and generating reports.

Prerequisites

Before learning the concepts of Selenium, you should have a basic understanding of java or any other object-oriented programming language.

Languages supported by Selenium include C#, Java, Perl, PHP, Python and Ruby.Currently, Selenium Webdriver is most popular with Java and C#. So, if you know any of the languages then it won’t be tough to understand the concepts of Selenium. In addition, you should have prior knowledge of software testing techniques like automation testing, functional testing, etc.

Audience

Our Selenium Tutorial is designed for all beginners and advanced-level Selenium users.

Learn Selenium Webdriver Basics.

1- In this Selenium Webdriver tutorial, you’ll get the study material to learn the basic concepts.

1.1- Selenium Components for Test Automation.
1.2- Visualize the Selenium Webdriver Architecture.
1.3- What are the tools Selenium supports?

1.3.1- What is Selenium RC?
1.3.2- What is Selenium IDE?
1.3.3- What is Selenium Webdriver?
1.3.4- What is Selenium Grid?

1.4- What is the difference between Selenium IDE, Selenium RC, and Selenium Grid?

Tutorial 2 : How to Setup Selenium WebDriver Project

Let us Learn how to use the Selenium WebDriver Project

2-1 . Install Eclipse IDE

2-2. Create Project in Eclipse

2-3. Download Selenium WebDriver jar files


Installation and Configuration of Selenium WebDriver

Before going through how to install Selenium WebDriver. Let’s look into in the pre-requisities we need to install Selenium WebDriver.

We need to have the following
i. Mozilla Firefox
ii. Active Internet Connection

Follow the Steps for complete installation and Configuration of Selenium WebDriver :-

Step 1: Download and Install Java

Step 2: Download and Install Eclipse IDE

Step 3: Download and Install FireBug

Step 4: Download and Install FirePath

Step 5: Download and Install WebDriver

Step 1 : Download and Install Java

Go to the below mentioned link and download latest version of JAVA

http://www.oracle.com/technetwork/java/javase/downloads/index.html

Accept the license agreement and choose the right ‘JDK’ file to download based on your system requirement.

Once downloaded. Go ahead and verify the Java version. To do this, open command prompt and type “java -version” and hit enter

Step 2: Download and Install Eclipse

Go to the following link to download eclipse

https://eclipse.org/downloads and then Download the appropriate file based on your system requirement

  1. Download ‘Eclipse IDE for Java Developers’.
  2. Extract the eclipse file which you have downloaded
  3. Right click on ‘eclipse.exe’ and run it as ‘Run as administrator’
  4. Choose specified path to create ‘workspace’ by using ‘Browse’ button.
  5. You could create Java Projects, Packages and Classes in Java Eclipse.

Note : Some of the modern browsers comes with preloaded firebug add-on check while before downloading the add-on and installing it.

Step 3. Download and Install FireBug

Go to the link mentioned below to install Fire Bug.

https://addons.mozilla.org/en-US/firefox/addon/firebug

Click on Add to Firefox button for installation and click on install button.

Now you could see Fire Bug by navigating through

Tools – Web Developer – Firebug – Open Firebug (or) use shortcut key ‘F12’

Step 4: Download and Install FirePath

Go to the link mentioned below to install Fire Path

https://addons.mozilla.org/en-US/firefox/addon/firepath/

Click on Add to Firefox button and install button and restart the browser. After starting you can see firepath by navigating through Tools – Web Developer – Firebug – Open Firebug (or) use shortcut key ‘F12’

You could find the ‘XPath’ by using ‘FirePath’ in the Firefox browser by checking it.


Step 5: Download and Install Selenium WebDriver

Go to the following link to download latest Selenium Java jars (latest Selenium WebDriver jars).

http://seleniumhq.or/downloads or https://jar-download.com

  1. Extract the selenium file. Open Eclipse and create new project.
  2. File – New – Java Project.
  3. Add project name and click on Next followed by Finish.

Create a Package:

Right click on the project you have created and select New – Package Enter name of the package and click on Finish

Right click on the project you have created and select New – Class

Enter name of the class and click on Finish

Now right click on the newly created project and select ‘Properties’ – ‘Java Build Path’. Select Libraries Tab and click on ‘Add External Jars’

Select all the jars files as shown in the below images and click on Open

Now you could start your first Selenium WebDriver Program.

You may like the following posts.

Shift Left Testing: A Secret Mantra for Software Success

The new Shift Left Testing, a Dev Ops mantra in Software Development:

A quick Recap of all the video tutorials in Dev Ops was explained in our earlier tutorial. Now, we will see about Shift left testing.

When I use the term ‘Shift Left’, you might be wondering what am I referring to Shift Left in a software??

2+ decades ago, when I started my career as a software tester there was no separate ‘Testing Phase’ for Software development and Testers Role never used to exist at all. Developers used to develop the software, test themselves and make a software release.

The concept of Software Testing got introduced gradually when defects from the production started hitting the budget of the project and hence ‘Functional Testing’ came into effect with a very lean team of Testers. At that point of time, we were just two Testers against a team of 20 Developers.

The IT Industry started following the waterfall model for the software development where-in we all know the Software development lifecycle goes sequentially in the order of Requirements => Design => Coding => Testing. So if you start from left to right, The testing phase is to the extreme right of the Software development lifecycle

Introduction to the Concept of Shift Left

Over the period of time people started to realized the importance of Software Testing and the impact of keeping Testing Phase extreme right or at the end of the Software development lifecycle. This realization happened because the cost of the bug identified towards the extreme right at the end was very high and enormous effort & too much time to fix them.

There were cases where after spending so much time and effort on a software, due to the crucial bug identified at the end, the mission critical software could not be released to the market there by resulting in the huge loss.

Hence because of identification of the bug during the last stage the release was delayed or at times, the software was scrapped by considering the effort to fix them, which was not really worthy.

‘Defects are less costly when caught early’.

This realization and the big lesson learned, introduced a great revolution in the software industry and gave birth to a new concept called ‘Shift Left’, which means shift the ‘Testing Phase’ to the Left from Right or involve Testing at every stage and involve testers throughout.

Shift Left testing also means that just don’t test in the end but test continuously.

What is Shift Left Testing?

Firstly, the principle of ‘Shift left’ supports the Testing team to collaborate with all the stakeholders early in the software development phase. Hence they can clearly understand the requirements and design the test cases to help the software ‘Fail Fast’ and enable the team to fix all the failures at the earliest.

Shift Left approach is nothing but involving the testers much earlier in the software development life cycle, which in turn would allow them to understand the requirements, software design, architecture, coding and its functionality, ask tough questions to customers, business analysts, and developers, seek clarifications, and provide feedback wherever possible to support the team.

This involvement and understanding will lead the testers to gain complete knowledge about the product, think through various scenarios, design real-time scenarios based on the software behavior which would help the team in identifying the defects even before coding is done.

How does Shift Left Influence Software Development?

Shift Lift Approach influences Software Development in several ways.

Given below are few key points about Shift Left:

  • Shift Left approach focuses on involving testers in all and most importantly the critical stages of the program. This enables the testers to divert their focus from defect detection to defect prevention and to drive the business goals of the program.
  • Shift Left approach provides, high importance to Testing with which the roles and responsibility of the testers increase immensely.
  • With the responsibility being increased for the Testing team, the team just does not focus on ‘Testing the software to identify the bugs’, but proactively works with the team right from the initial stages to plan and build a robust and effective testing strategy by providing a great Test leadership and guidance to the team by focusing on the long-term vision of the product, rather than just taking the responsibility of the testing work.
  • Shift Left approach gives the opportunity for the Testers to design the tests first, where the tests are completely focused on the customer experience and their expectations which in turn will enable the developers to develop the software based on these tests and hence meet the customer needs.
  • Shift Left approach just does not end with the Testers alone. Moving to the let and carrying out the testing activities continuously will also allow the Developers to take more ownership of their code and increase their responsibilities on testing.
  • Shift Left approach also encourages Testers to adopt Behavioral driven development BDD and Test-driven development TDD, which helps in preventing the defects induction into the software.
  • Shift Left Testing in Agile: Shift Left approach supports forming Agile Scrum Teams which mandatorily includes Testers along with the other roles and includes Testers in regular stand up calls, other interactions, review meetings which has made the testers to have more information related to the program and hence has allowed them to indulge and involve in the detailed analysis of the software and provide rapid feedback which would help in preventing the defects grounded in the software.

Overall Shift Left testing calls for the testers to ‘Get Involved Early’, as early as possible and engage in the discussion and collaborate on ideas, requirements at every stage where the outcome of the stage has a bearing on the value of the final deliverable and also help the project to identify the risks and mitigate it in advance.